


Self-sewn potholders
- melacavo
- Jan 27, 2024
- 2 min read
Updated: Jan 30, 2024
Conjure up a beautiful DIY kitchen accessory with fabric remnants...

Are you looking for a quick DIY gift or a souvenir or do you need new potholders in your kitchen? Maybe you just want to add some colorful accents to your kitchen with new potholders? Here I show you step by step how you can easily sew your own potholders from fabric scraps. It's quick and easy - have fun!
You'll need the following for sewing your own potholders:
Fleece interfacing - either extra heat-resistant interfacing for potholders or old towels or other sturdy fabric
two square pieces of fabric (approx. 25x25cm)
an approx. 4cm wide strip of fabric or bias tape
yarn in a matching color
Step-by-step instructions
Cut square pieces from the interlining (e.g. from fleece) and twice from the outer fabric in the desired size of the potholders. I used two pieces of fusible interfacing so that I wouldn't burn my fingers later, despite the heat resistance.
Now place the interfacing between the two fabric squares, with the pretty side of the fabric facing outwards.
Topstitch the three layers together using a wide straight stitch. Depending on the pattern of the fabric, you can stitch diagonally or parallel to the sides. You can also topstitch them crosswise, whichever you prefer. If you like concentric circles best, you can do that too - it's just more difficult ;-) ...


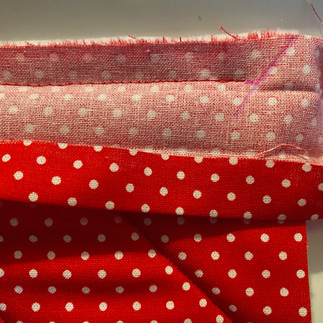
Then trim the edges so that the three layers of fabric are flush with each other and nothing protrudes.
Now all that's missing is the edging and the potholders are ready: iron the fabric strip by folding it inwards or use ready-made bias tape. Of course, you can also use a bias tape former, but an iron will do the same job.


Now start to place the bias tape/the fabric strip shaped into bias tape on one side, pin and sew it in place all the way around. You have several options for the corners: 1. fold the corners (see photos) or 2. round off the corners of the potholders with scissors (see blog post on children's potholders).


Then turn the potholder to the other side and sew the bias tape in place from the other side.


Use the end to form a hanger and stitch it in place at the end.


Done! Have fun cooking, baking or simply looking at your creations :-)!
By sewing potholders, you can bring exactly the right colors into your kitchen and set beautiful accents - here in warm sunny yellow:


If you liked the post, please share it and leave me a comment. You can also take a look at the other sewing projects on my blog, for example the children's potholders, pennant chains or simple children's clothes such as scarves.
Give me a hug and see you soon!


Opmerkingen