


DIY flower vase made from a light bulb
- melacavo
- Feb 10, 2024
- 3 min read
seductive, fascinating, crazy - for individual flowers


As you probably already know from me, the environment (both in terms of climate protection and in terms of my small personal cozy environment) is close to my heart. Although I really appreciate the energy-saving and more environmentally friendly properties of LED lamps, I have to admit that I still prefer the real light bulbs of old. I have the impression that the light from the old bulbs has a different effect. It just seems more natural to me and I like it better. To put it more scientifically, I find the light from conventional light bulbs rounder and softer thanks to their continuous spectrum.
In this post, however, we're not talking about light bulbs, but about an idea to give a burnt-out light bulb a new lease of life as a small vase: a DIY sculpture that beautifully showcases individual flowers. The light bulb becomes a decorative element, a small, beautifully shaped work of art, a fun conversation starter and a practical vase. And, of course, it still provides a beautiful play of light and reflections. Without wishing to be self-serving, I think this upcycling idea is a good project that has saved the light bulb from the dustbin.
For this project you need
an old light bulb
a piece of wood
4 screws
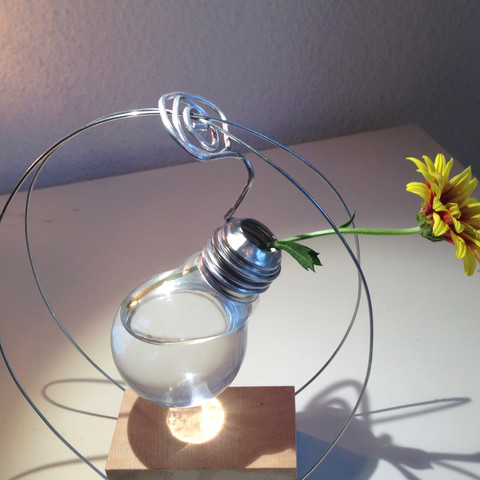
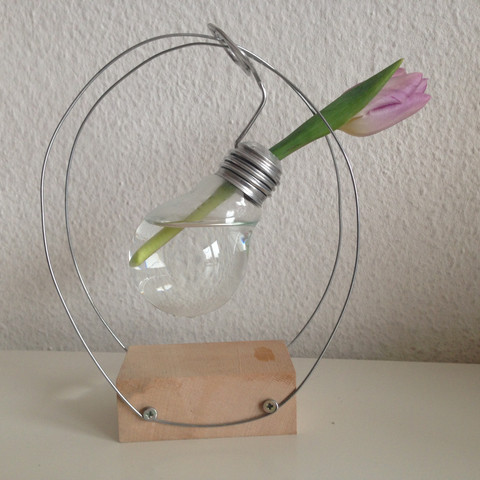
This vase is easier to build than it might seem at first glance. The only slightly more difficult part is cutting a hole in the metal part of the light bulb without damaging the glass in order to remove the inner workings of the filament and electrical contacts. Using a serrated kitchen knife, slowly and carefully cut a circular hole around the center below the thread where the metal softens a little. You can first score the shape and then separate it from the outer metal cylinder. Once you have done this, the inside of the bulb is already loose and can be carefully pulled out. Be careful not to break the glass, as you may cut yourself or be forced to start again with another bulb. I was very careful and very relieved that it worked with the first bulb. I used a small piece of wood as a base, to which I attached four small wood screws symmetrically at the corners. As you can see in the photos, these four screws were used to attach the metal wire that forms the base from which the light bulb is ultimately suspended. The light bulb is held in place by another metal wire made of the same material. I used aluminum wire because it is beautiful to look at due to its shine and is also very easy to work with your hands thanks to its flexibility. In addition, aluminum does not oxidize quickly and therefore does not darken, but remains shiny as on the first day. All I had to do was form a ring into which I screwed the thread of the light bulb and from which a simple spiral emanates. Not only do I like the spiral shape, but it is also practical as it can be easily threaded around the wires of the base frame. That's all: at this point you can fill the bulb with a little water and place a flower inside.
Near a window, as in our house, the water in the light bulb conjures up beautiful light reflections as you can see in the photo. I kept it quite simple by just forming a circle out of the wire, but the number and variety of figures and shapes that your imagination and creativity can try out are unlimited. For example, for a gift, you can write the person's name on the wire and hang one or more light bulbs on it. I used a base made of untreated wood, but you can also paint them with acrylic paint or spray them with some clear varnish to make them more resistant to water stains or dust.
I would love to see how you have reproduced or improved on my inspiration. If you like my post, if I could be helpful in your search for an easy-to-implement DIY project that will make your day, your home or that of a dear friend a little more beautiful, please let me know. Or feel free to share the post with someone who might be interested. In any case, I hope you've had a relaxing time reading this and that you enjoy the colorful pictures. Feel free to stop by here to find inspiration. A hug and see you soon!


Comments